Guide
External Resources
Terminologies used in this project
-
Categories: are of following types Artificial Intelligence (AI), Electronic Structure (ES), Force-field (FF), Quantum Computation (QC) and Experiments (EXP). Each of these categories are divided into sub-categories. These sub-categories include single-property-prediction, single-property-classification, machine-learning force-fields, text-classification, text-token classification, text-generation, image classification, image-segmentation, image-generation, spectra-prediction, and eigensolver. These categories and sub-categories are highly flexible and new entries can be easily added.
-
Sub-categories: include 1) SinglePropertyPrediction (where the output of a model/experiment is one single number for an entry), 2) SinglePropertyClass (where the output is class-ids, e.g., 0,1,.. instead of floating values), 3) ImageClass (for multi-class image classification), 4) textClass (for multi-label text classification), 5) MLFF (machine learning force-field), 6) Spectra (for multi-value data) and 7) EigenSolver (for Hamiltonian simulation).
-
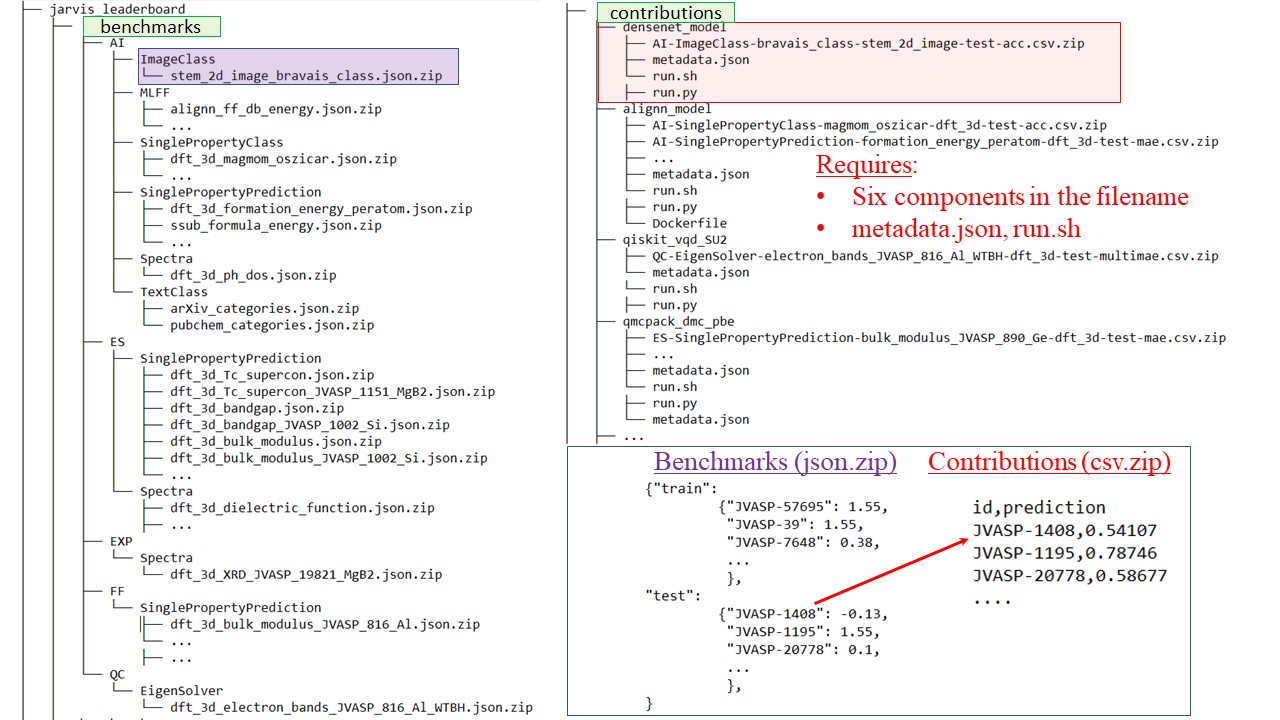
Benchmarks: are ground truth data used to calculate metrics for each specific task (e.g a json.zip file).
-
Methods: are a set of precise specifications for evaluation against a benchmark. For example, within ES category, DFT with VASP-GGA-PAW-PBE are specifications, hence a method. Similarly, within AI category, descriptor/feature based models with MatMiner-chemical features and LightGBM software are specifications, hence a method.
-
Contributions: are individual data in form of csv.zip files for each benchmark and specific method. Each contribution has six components: method (e.g. AI), category (e.g. SinglePropertyPrediction), property (e.g. formation energy), dataset (e.g. dft_3d), data-split (e.g. test), metric (e.g. mae).
A tree diagram for directory and file structure
How to contribute
1. How to add a contribution (csv.zip):
For a short demo, checkout this google colab-notebook
Prerequisites (for those not familiar with GitHub):
A GitHub username and a basic familiarity with GitHub is needed to work with the JARVIS-Leaderboard. See below:
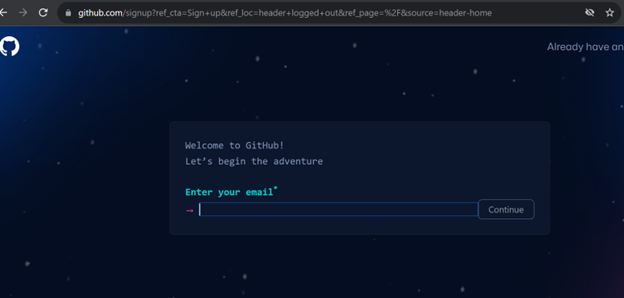
If you do not have a GitHub account, sign up for one at: https://github.com/signup Related article: https://www.toolsqa.com/git/how-to-create-github-account/
Suppose you choose your username as “knc6”, you’ll have a webpage at https://github.com/knc6 . Ofcourse, choose some other username of your choice, but for the following demo, we will use the “knc6” as an example username.
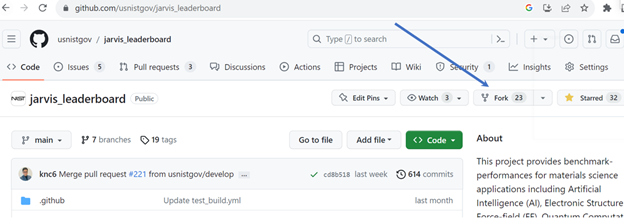
Once you have the GitHub account, go to the website https://github.com/usnistgov/jarvis_leaderboard. Here Fork (make your own copy) of the JARVIS-Leaderbord repo by clicking on the “Fork” button. Also, feel free to click on the “Star” button if you like the JARVIS-Leaderboard project.
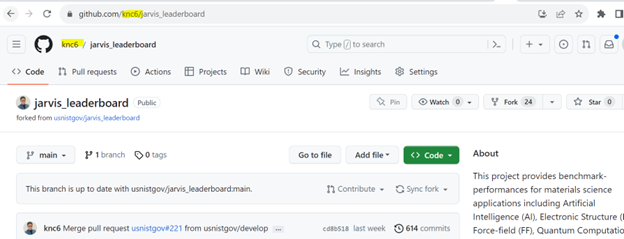
Now, go to your forked version of the JARVIS-Leaderboard. For a username “knc6”, you’ll have a repo at https://github.com/knc6/jarvis_leaderboard. Notice, we have “knc6” in the URL instead of usnistgov. Ofcourse, use your own username instead of knc6.
Now, we will make a pull request (request to contribute your edits in the main repo). If you are not familiar with pull requests checkout this link
If successful with basic GitHub setup, follow the guidelines:
- Go to your forked jarvis_leaderboard repo.
-
git clone https://github.com/USERNAME/jarvis_leaderboard. NOTE: use your own GitHub USERNAME, e.g. knc6, instead ofusnistgovNote if you do not use forked version, you won't be able to make a pull request
-
cd jarvis_leaderboard conda create --name leaderboard python=3.8source activate leaderboard- Install the package:
python setup.py develop - Let's add a contribution for Silicon bandgap using DFT PBE (an Electronic structure approach)
cd jarvis_leaderboard/contributions/
mkdir vasp_pbe_teamX , you can give any reaosnable name to the benchmark folder in place of vasp_pbe_teamX
cd vasp_pbe_teamX
cp ../vasp_optb88vdw/ES-SinglePropertyPrediction-bandgap_JVASP_1002_Si-dft_3d-test-mae.csv.zip .
vi ES-SinglePropertyPrediction-bandgap_JVASP_1002_Si-dft_3d-test-mae.csv.zip
Note: do not change filenames, e.g., replace dft with qmc etc., which will cause errors
After pressing eneter twice, you'll see the file content as id,prediction
Just modify the predicting value to your model/measurement value
Save the file (":wq!" and ":q!")
Add metadata.json and run.sh files to capture metadata and enhance reproducibility. The metadata file must have at least your project_url and model_name info. The project_url couls be a publication/GitHub page etc.
Note: An admin will run your run.sh to check if he/she can reproduce your benchmark
Now, cd ../../../
python jarvis_leaderboard/rebuild.py
which will compile all data, compare with reference dataset and calculate metrices
Hoping there's no error, try: mkdocs serve
Ensure vasp_pbe_teamX row exists at:
http://127.0.0.1:8000/usnistgov/jarvis_leaderboard/ES/SinglePropertyPrediction/bandgap_JVASP_1002_Si/
Now add changes, git add jarvis_leaderboard/contributions/vasp_pbe_teamX
Commit your changes, git commit -m 'Adding my PBE Si result.'
git push
Now go to your forked github repo and make a pull reuqest (PR) to usnistgov/jarvis_leaderboard in develop branch
If you are not familiar with pull requests checkout this link
Note: only admins are allowed to make pull requests to main branch
Once an admin approve the PR, you'll see your results on the official leaderboard
- Another example for AI mode as follows:
Populate the dataset for a benchmark, e.g.:
python jarvis_leaderboard/populate_data.py --benchmark_file AI-SinglePropertyPrediction-exfoliation_energy-dft_3d-test-mae --output_path=Out
Currently, this script works for atomistic tasks only, addition of other tasks will be available soon.
Train you model(s), e.g.:
pip install alignn
wget https://raw.githubusercontent.com/usnistgov/alignn/main/alignn/examples/sample_data/config_example.json
train_folder.py --root_dir "Out" --config "config_example.json" --output_dir="temp"
Create a folder in the jarvis_leaderboard/contributions folder under respective submodule, e.g.:
mkdir contributions/my_awesome_model
Add comma-separated zip file (.csv.zip) file(s) corresponding to benchmark(s), e.g.:
cp temp/prediction_results_test_set.csv .
mv prediction_results_test_set.csv AI-SinglePropertyPrediction-exfoliation_energy-dft_3d-test-mae.csv
zip AI-SinglePropertyPrediction-exfoliation_energy-dft_3d-test-mae.csv AI-SinglePropertyPrediction-exfoliation_energy-dft_3d-test-mae.csv.zip
mv AI-SinglePropertyPrediction-exfoliation_energy-dft_3d-test-mae.csv.zip jarvis_leaderboard/contributions/my_awesome_model
Add metadata info in the metadata.json file, e.g.:
cp jarvis_leaderboard/contributions/alignn_models/metadata.json jarvis_leaderboard/contributions/my_awesome_model
Also, add a run.py, run.sh and Dockerfile scripts to reproduce the model predictions.
Run python jarvis_leaderboard/rebuild.py to check there are no errors
Run mkdocs serve to check if the new benchmark exists, e.g. at page
http://127.0.0.1:8000/usnistgov/jarvis_leaderboard/AI/SinglePropertyPrediction/exfoliation_energy/
Add. commit and push your changes, e.g.:
git add jarvis_leaderboard/contributions/my_awesome_model
git commit -m 'Adding my awesome_model to jarvis_leaderboard
git push origin main
Make a pull request from your fork to the source repo at usnistgov/jarvis_leaderboard develop branch
Notes:
-
The word:
SinglePropertyPrediction: task type,test, property:exfoliation_energy, dataset:dft_3d, method:AI, metric:maehave been joined with '-' sign. This format should be used for consistency in webpage generation. -
The test data splits are pre-determined, if the exact test IDs are not used, then the code might result in errors.
2. How to add a new benchmark (json.zip):
-
Create a
json.zipfile in thejarvis_leaderboard/benchmarksfolder under respective sub-category, e.g.:e.g.
jarvis_leaderboard/benchmarks/AI/SinglePropertyPrediction/dft_3d_exfoliation_energy.json.zip.An example of a new json.zip (mydb_myprop.json) file can be found here as well.
-
In the
.jsonfile should havetrain,val,testkeys with array of ids and their values.Note
trainandvalcan be empty dictionaries if the benchmarks are other than AI method -
Add a .md file, e.g.:
jarvis_leaderboard/docs/AI/SinglePropertyPrediction/exfoliation_energy.md. This is where contributions performers will be kept and website info will be generated. -
An example for creating such a file is provided in:
jarvis_leaderboard/benchmarks/AI/SinglePropertyPrediction/transform_from_figshare.py -
Then follow the instructions for "Adding model benchmarks to existing dataset"
Notes:
A new benchmark must be linked with a peer-reviewed article and must have a DOI to ensure a minimum quality assurance for the data.
We recommend adding your large dataset in Figshare or similar repository and then integrate it in JARVIS-Tools
We also recommend to use JARVIS-Tools for generating dataset/models/benchmarks which can help us maintain the benchmark for long term.
Methods used for generating the data and referece are given below:
| Method used for results | Methods for comparison |
| EXP | EXP/ES/analytical results |
| ES | ES/EXP |
| FF | ES/EXP |
| QC | Classical/analytical results |
| AI | Test set data |
Acronyms
- MAE: Mean Absolute Error
- ACC: Classification accuracy
- MULTIMAE: MAE sum of multple entries, Euclidean distance
- For names of datasets and associated propertiesm refer to datasets in JARVIS-Tools
Help
Ask a question/raise an issue on GitHub. You can also email Kamal Choudhary if needed (kamal.choudhary@nist.gov). However, we recommend using the GitHub issues for any questions/concerns.
Citation
Large Scale Benchmark of Materials Design Methods
License
This template is served under the NIST license.
Read the [LICENSE] file for more info.