Installing via Anaconda#
Installing HyperSpy with Anaconda is slightly more involved, but provides more flexibility if you plan to do more development with Python, or need to run many different Python programs on your machine alongside each other.
While it is mostly unattended, the download and installation of Anaconda can take a fair amount of time (approximately 10 to 15 minutes, depending on the speed of your system), so it is highly recommended to do this before you arrive at the tutorial session (and when you have access to a decent internet connection).
Download#
The installation process for Anaconda varies a bit depending on your operating system. Instructions for Windows are detailed here. MacOS will be somewhat similar, while if you run Linux, you will need to use the command line installer (an exercise left to the reader). From the Anaconda Python link, click the right download for your operating system:
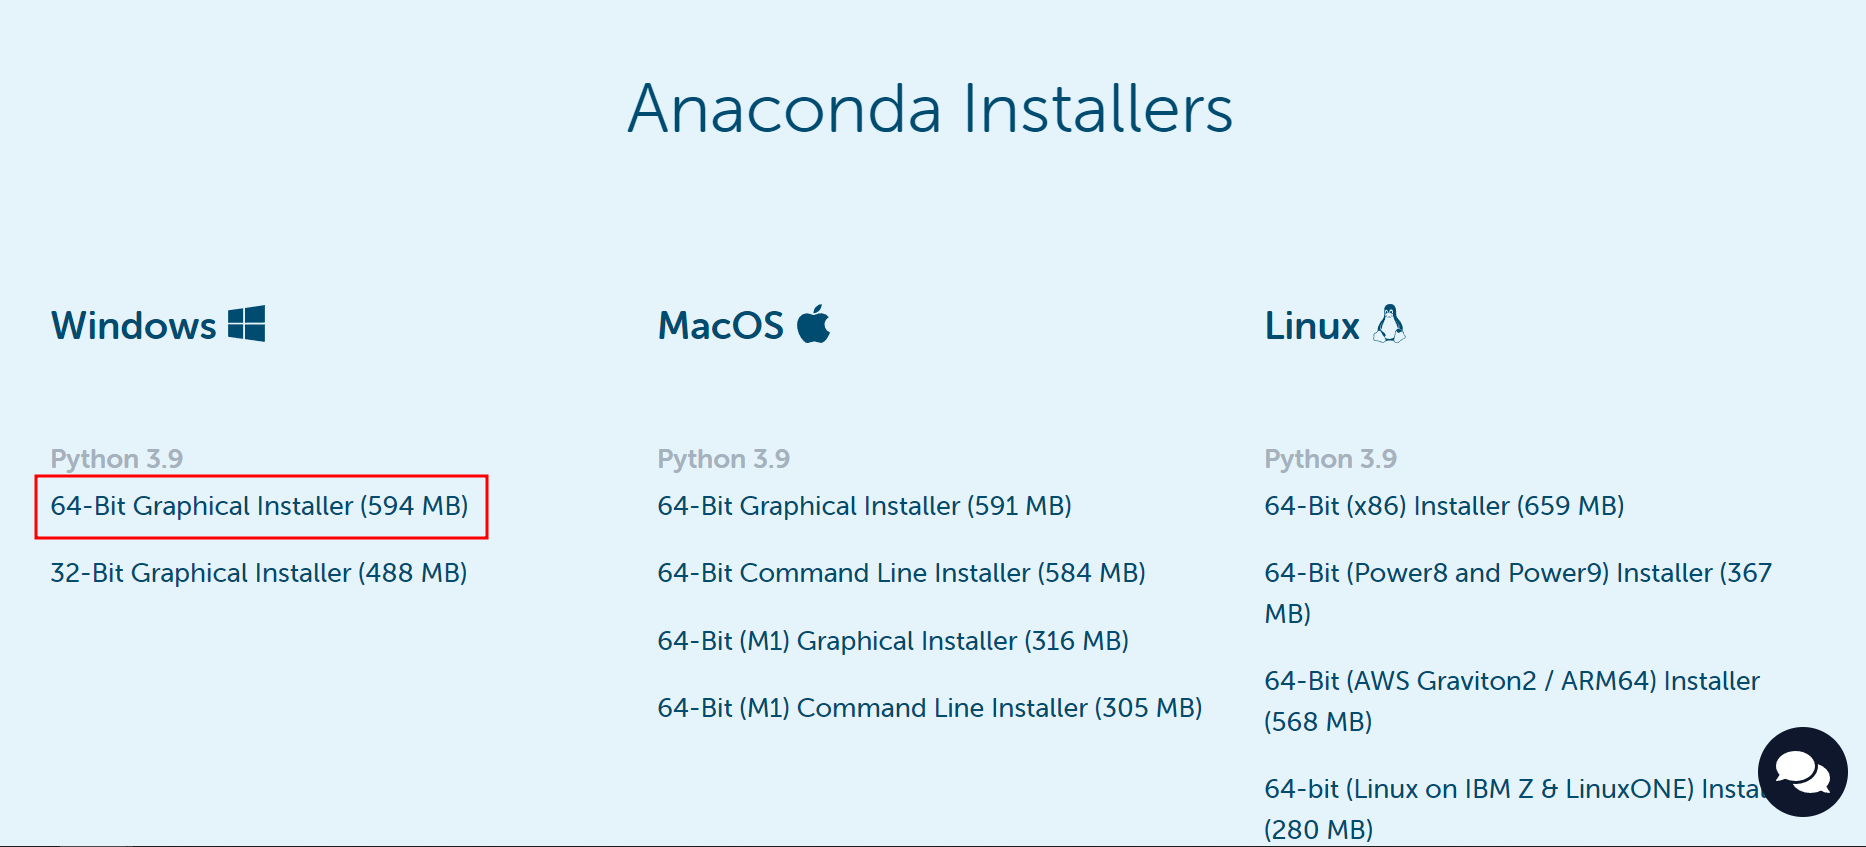
Make sure to select the 64-bit – It’s a rather large download, so a decent connection is recommended. Also make sure to choose Windows, macOS, or Linux depending on your system#
Installing Anaconda#
Detailed instructions for Windows, macOS, and Linux are available on the Anaconda website. Specific instructions for Windows are reproduced below.
Run the downloaded file to proceed with the installation. This process is fairly
straightforward. For the installation location, we highly recommend an easily
accessed path that does not require administrative rights, such as the folder
anaconda3 within your user directory:
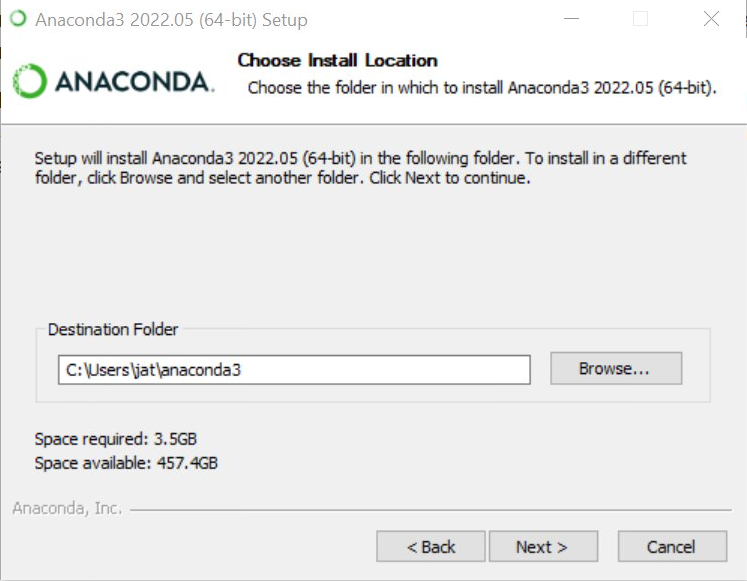
This path can be whatever you want (where you have write access), but a subfolder in the user directory is usually a convenient location - the default option is also fine#
The next screen will present you with options about adding Anaconda to the
system PATH variable, and whether or not you want this installation to
be registered as the “default” Python installation on your system (via a
key saved to the registry on Windows). We recommend the default options (as
shown below), but if you have other Python installations on your system, you may
want to uncheck the “Register as default” option:
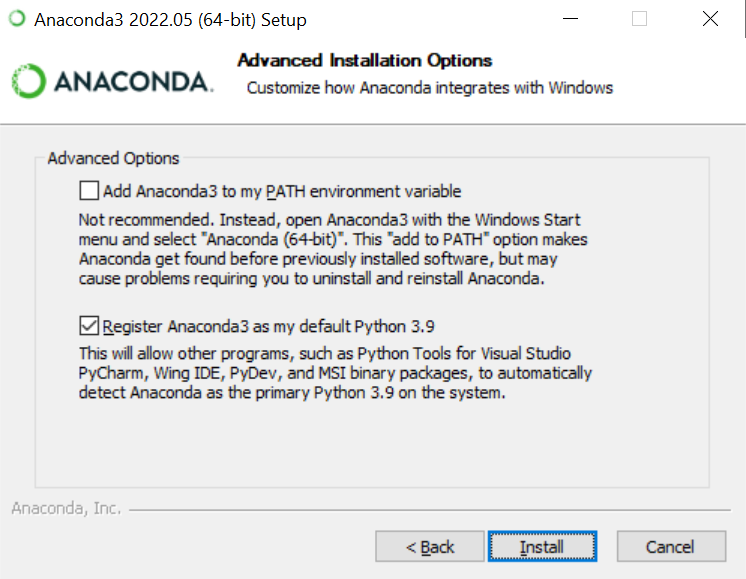
Specifying configuration settings for the Anaconda installation on Windows#
Click the “Install” button at this point, and go to get a coffee or tea (or go for a walk), as the installation process takes some time depending on your disk speed.
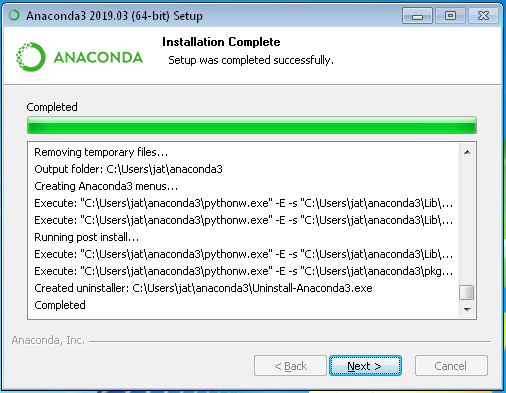
The “Installation complete” screen after installing Anaconda on Windows#
Once the installation completes, click the “Next” button to continue and then “Finish” to exit the installer.
Usage#
After Anaconda is installed, we suggest taking a look at the
“Getting Started” guide from its documentation to familiarize yourself with
how Anaconda is used. There are a few ways to interact with Anaconda, primarily
through either the “navigator” application, or on the command line. One of the
most powerful features of Anaconda is the conda environment and package
manager, which allows you to create multiple different “installations” (known as
environments) of Python, enabling you to select which version of Python is
used for each environment and what packages are installed inside that
environment. A common setup is to have one environment for each project or
application you are working with. For this tutorial however, we will install
HyperSpy into the base (the default) environment (for ease of use) using
the command line.
Installing HyperSpy with Anaconda#
Like for Anaconda, detailed installation instructions for HyperSpy are available directly from its documentation. The process will also be summarized here with a bit more instruction.
Info about code blocks
In the following section, lines in code blocks will be prefaced with $
or >>>. $ is used to indicate regular terminal input, while >>>
represents inputs to the Python interpreter (accessed by running python
from the regular command line. Any lines without these symbols
indicate the expected output of the given command. To run the
commands provided, copy everything after the $ or >>> character into
your terminal. Where necessary, commands will be given for both the Windows
Anaconda prompt and the macOS/Linux terminal, so only use the commands
specific to your operating system.
From the Start Menu (on Windows), open the Anaconda Prompt:

Windows programs installed by Anaconda#
On Mac or Linux, open a terminal as normal. If during installation you told
the installer to “initialize” Anaconda3, all the conda commands should
be immediately available. If not, you will have to run the following, replacing
the bracketed term with the actual path in which you installed Anaconda:
$ source <ANACONDA_INSTALL_PATH>/bin/activate
before any of the conda commands will work. Again, this is only for
Mac/Linux, the commands should be available with no problem on Windows when
you launch the Anaconda Prompt.
From the prompt, run the following to install HyperSpy, its UI package, and its dependencies:
$ conda install -c conda-forge hyperspy hyperspyui kikuchipy atomap pyxem
After Anaconda calculates the dependencies (this may take quite a while,
please be patient) it will need to install, it will ask for confirmation to continue.
Press Enter to accept the changes, and wait for the requested libraries to be
installed.
Extension packages
The “extension” libraries kikuchipy, pyxem, and atomap will be
installed using the command above. These are not absolutely necessary to install
if you wish to just use HyperSpy on its own, but since these libraries will
be covered in the short course, you will need to have them installed if you
wish to follow along interactively.
Testing the installation#
Once the install is completed, if you would like to test that your installation
is working properly, you can run a small test example by opening the
“Qt Console”. From within the Anaconda Prompt, enter the following command
and then press Enter:
$ jupyter qtconsole
The Qt Console is an interactive Python interpreter that allows you to enter
Python statements directly and immediately see their output. Once the console
has opened and you see a prompt that says In [1]:, copy the following code
snippet at the location of the blinking cursor:
%matplotlib qt
import hyperspy.api as hs
s = hs.datasets.artificial_data.get_core_loss_eels_signal(add_powerlaw=True)
s.remove_background()
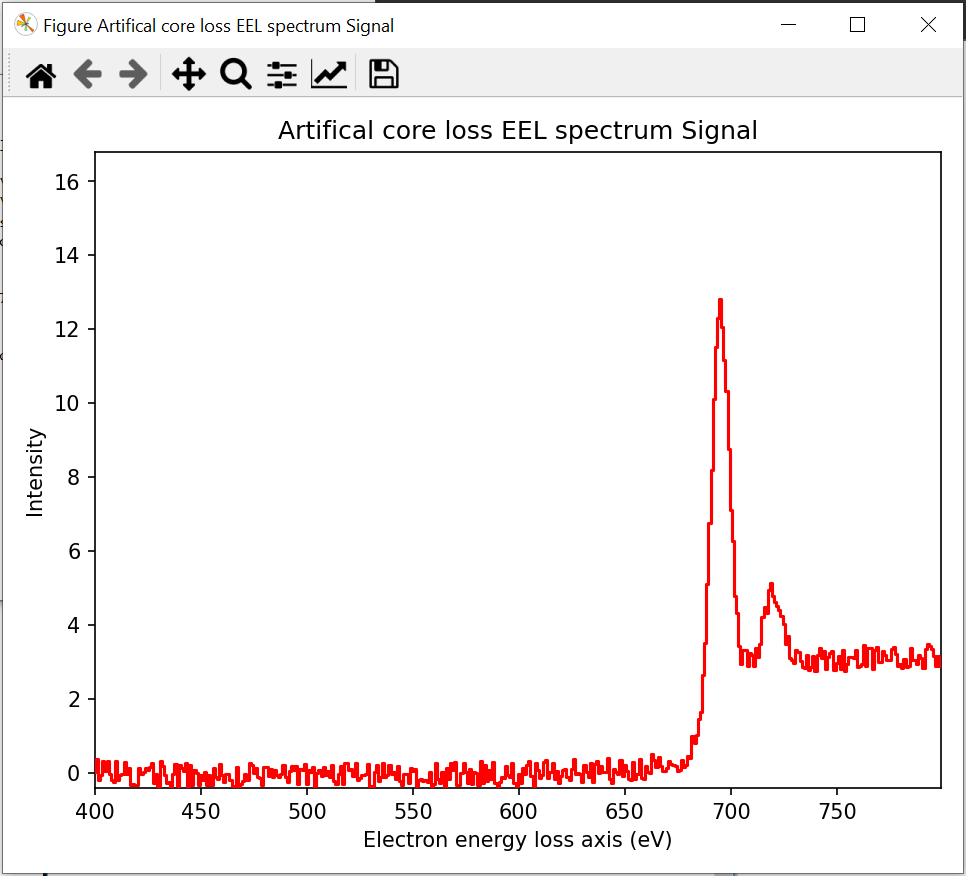
Very briefly, this code is loading the interactive plotting libraries, loading
HyperSpy, creating an example EELS signal from some artificial data, and then
telling the interpreter you want to interactively remove the Power Law
background. Press Shift-Enter within the console to run the lines of code
you pasted in (it may take a few moments to run if this is the first time
you’ve used HyperSpy on your machine):
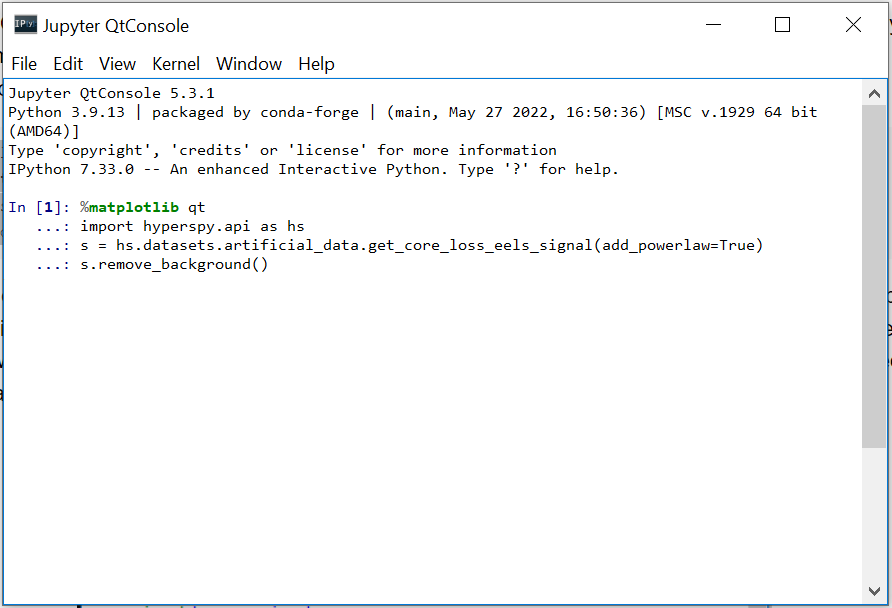
Entering the example code into the Qt Console#
Eventually, you should see a spectrum window and a small tool window for removing the background open (they may be stacked on top of each other; drag them out of the way, if so). If you click and drag on part of the spectrum display, HyperSpy will fit a Power Law to the signal within that region, and also show you a preview of the background-subtracted signal:
By clicking and dragging on the spectrum display, a region is created (shown in red). The fitted background is shown in blue, and a preview of the background-subtracted signal is displayed in green.#
Clicking “OK” in the Background removal tool window will perform the background subtraction, and replace the window with one showing the resulting signal:
Assuming all of this worked, congratulations! You have a working HyperSpy installation and you have run your first bit of open-source HyperSpy-based materials science data analysis! Click the button below to return to the main tutorial homepage: