2022 M&M Short Course X-16#
Data Analysis in Materials Science#
Thank you for registering for the 2022 Microscopy and Microanalysis short course on data analysis in materials science, presented by the developers of HyperSpy. This interactive tutorial session will introduce you to modern techniques of data analysis for materials science and microscopy data within the scientific Python environment, with plenty of time for questions and individual help. The ultimate goal for the session is that by its end, each attendee feels comfortable using HyperSpy for basic imaging and hyperspectral data analysis, and knows where to look for further help, if necessary.
There are a few useful links in the left sidebar of this page. The first (Tutorial Repository) will take you to the git repository containing the notebooks and data we will use during the tutorial. The next (Launch Binder) will open that repository in an interactive “Binder”, which will allow you to run the tutorial code in your browser without having to install anything (although we recommend you take this opportunity to install HyperSpy on your local system – see below). The next two point to the HyperSpy Homepage and User Guide, respectively. The homepage contains general information about the project as a whole, while the User Guide is an extensive piece of documentation that explains how to use HyperSpy for all sorts of analyses. Feel free to refer to these links before and during the tutorial session for additional help.
The sidebar on the right (click the small icon at the top of the page with lines and an arrow to the left if you do not see the sidebar) will help you navigate the content of this page, which has been set up to provide you with information about the course and some instructions to follow before you attend on Sunday. Please take the time to read through the content and follow the instructions in advance of the course.
Session Logistics#
Date: |
Sunday July 31, 2022
|
Time: |
08:30 AM - 5:00 PM PDT (UTC-07:00) |
Location: |
Room B114
Oregon Convention Center
|
About the instructors#
|
Jordi Ferrer Orri (JFO) is a PhD Candidate at the NanoDTC working with
Sam Stranks and Cate Ducati as supervisors. He studied his BSc
undergraduate in Maastricht University (the Netherlands) and his
MRes master in Nanoscience and Nanotechnology in Cambridge. He
is a regular user of HyperSpy, pyxem, and LumiSpy, and will be
helping the primary instructors out throughout the course.
(Contact: jf631@cam.ac.uk)
|
|
Carter Francis (CF) grew up in Prior Lake, Minnesota, a little
south of the Twin Cities. He received his B.S. from the Iowa
State University, majoring in Materials Engineering, minoring in
Math Economics. There he worked on the characterization of both
oxide and sulfide glasses for use as solid state electrolytes in
sodium battery systems. In the summer of 2016, Carter worked as
a foreign scholar at the Münster Electrochemical Energy
Technology (MEET) building in Münster Germany. There he worked
characterizing and producing gel polymer electrolytes with
ceramic inclusions. Carter is a graduate student at the
University of Wisconsin-Madison working as a research assistant
in Prof. Paul Voyles’ group. (Contact: csfrancis@wisc.edu)
|
|
Josh Taillon (JT) is a research engineer within the Office
of Data and Informatics in the Material Measurement
Laboratory at NIST, and has an extensive
background in materials science, microscopy, and data analysis
utilizing machine learning, artificial intelligence, and
state-of-the art signal processing techniques to facilitate
greater understanding of material systems. He is a (fairly)
regular contributor to the upstream HyperSpy project and has
been a user of the software for over 8 years.
(Contact: joshua.taillon@nist.gov)
|


Agenda#
Time |
Format |
Leader(s) |
Topic |
|---|---|---|---|
08:30 - 09:00 |
Help |
All |
Pre-course help for installation problems (30 minutes)
|
09:00 - 09:05 |
Talk |
JT |
Welcome and Announcements (5 minutes)
|
09:05 - 09:30 |
Talk |
JT |
Introduction to Scientific Python and HyperSpy (25 minutes)
|
09:30 - 10:15 |
Practical |
JT |
HyperSpy Basics (45 minutes)
|
10:15 - 10:30 |
Coffee Break (15 minutes)
|
||
10:30 - 11:15 |
Talk/Practical |
JT |
Machine Learning (45 minutes)
|
11:15 - 11:45 |
Practical |
CF |
Curve Fitting (30 minutes)
|
11:45 - 12:45 |
Lunch Break (60 minutes)
|
||
12:45 - 13:30 |
Practical |
JT |
EELS analysis (45 minutes)
|
13:30 - 14:15 |
Practical |
JT |
EDS Analysis (45 minutes)
|
14:15 - 14:30 |
Coffee Break (15 minutes)
|
||
14:30 - 15:15 |
Practical |
CF |
Big Data Analysis (45 minutes)
|
15:15 - 15:30 |
Talk |
CF |
An introduction to the HyperSpy extension ecosystem
(15 minutes)
|
15:30 - 17:00 |
Self paced
exploration
|
The remainder of the course time will be used for self-paced
exploration of HyperSpy’s extension packages, including
pyxem, kikuchipy, atomap, lumispy, and
particlespy, with guidance and Q&A with the instructors
(1.5 hours) |
Pre-tutorial instructions#
Please review this section in advance of Sunday’s tutorial session, as it includes instructions for installing HyperSpy and the Jupyter interactive computing environment.
Installation alternative
While we highly encourage you to follow the instructions below to install HyperSpy locally on your personal system, you can run all the code that will be covered in the session in your browser via the Launch Binder link (Note, we cannot guarantee the wireless connection at the conference center will be sufficient to use this method so again, we recommend a local installation). The “Binder” is a web-based installation of python that you can interact with through a normal web browser, without installing anything to your system. Completing the installation process is a useful learning experience however, and will be necessary if you wish to run your analyses on your own data after this course. There will be a one-hour “help session” prior to the official start of the short course program during which you are welcome to ask questions/get help if you have any issues with the installation procedure.
Prerequisites#
For participation in the session, a basic familiarity with Python and command line tools will be helpful, but not strictly required. You will need to follow the instructions below to install HyperSpy using either the Anaconda Python distribution (Windows, Mac, or Linux), or the pre-compiled “bundle” installer.
Installation#
At its core, HyperSpy is a third-party library that exists as part of the greater scientific Python ecosystem (as opposed to a stand-alone application). Because of this, installation is slightly different than a normal program, but is not too difficult once you understand the steps required. The two pieces required are a Python distribution (typically pre-installed on Mac and Linux; but not included on by default on Windows), and then the HyperSpy libraries that operate within that Python environment.
There are two possible approaches to getting a working HyperSpy environment. If you are brand-new to Python and the command line in general, we recommend using the pre-packaged “Bundle” Installer.
If you have some experience with Python, or if you expect to have multiple versions or environments of Python on your system, we recommend you install HyperSpy using Anaconda, due to its prevalence in the scientific community and the ease of managing multiple Python “environments” on one system. It also provides a uniform way of installing packages and managing the system regardless of operating system, as well as up-to-date versions of Python and library packages (often the “system” installation on Linux or Mac is out of date). Anaconda can also be installed and run without administrative privileges, meaning it can be used on remote systems easily regardless of ownership.
Click one of the following buttons to view the specific installation instructions for each method, then return to this page when you have completed the installation:
installation instructions Click here for Anaconda Python
installation instructions
Caution
It is important that you install HyperSpy using either the “Bundle” Installer, or through Anaconda (not both!). Installing both can work, but will leave you with multiple Python installations on your system, and it will be very confusing to try to solve any issues that arise if you are not experienced with Python.
Obtaining the tutorial data#
Please click
this
link to download the tutorial notebooks and data as a .zip file
(or click the big green button at the top of this page). Once downloaded,
extract the files into their own folder that is easily accessible. We recommend
a folder in your user’s home directory named hyperspy_tutorial
(i.e. C:\Users\<username>\hyperspy_tutorial on Windows).
Running the Jupyter Notebooks#
To actually open the Jupyter Notebooks containing the tutorials, you will need
to start a local Jupyter server and connect to it through your browser (don’t
worry, everything stays local and there’s no security risk to running the
notebook on localhost).
If you installed using the bundle, this is very simple. Just open the Start Menu and search for the “Hyperspy-bundle Prompt” option:
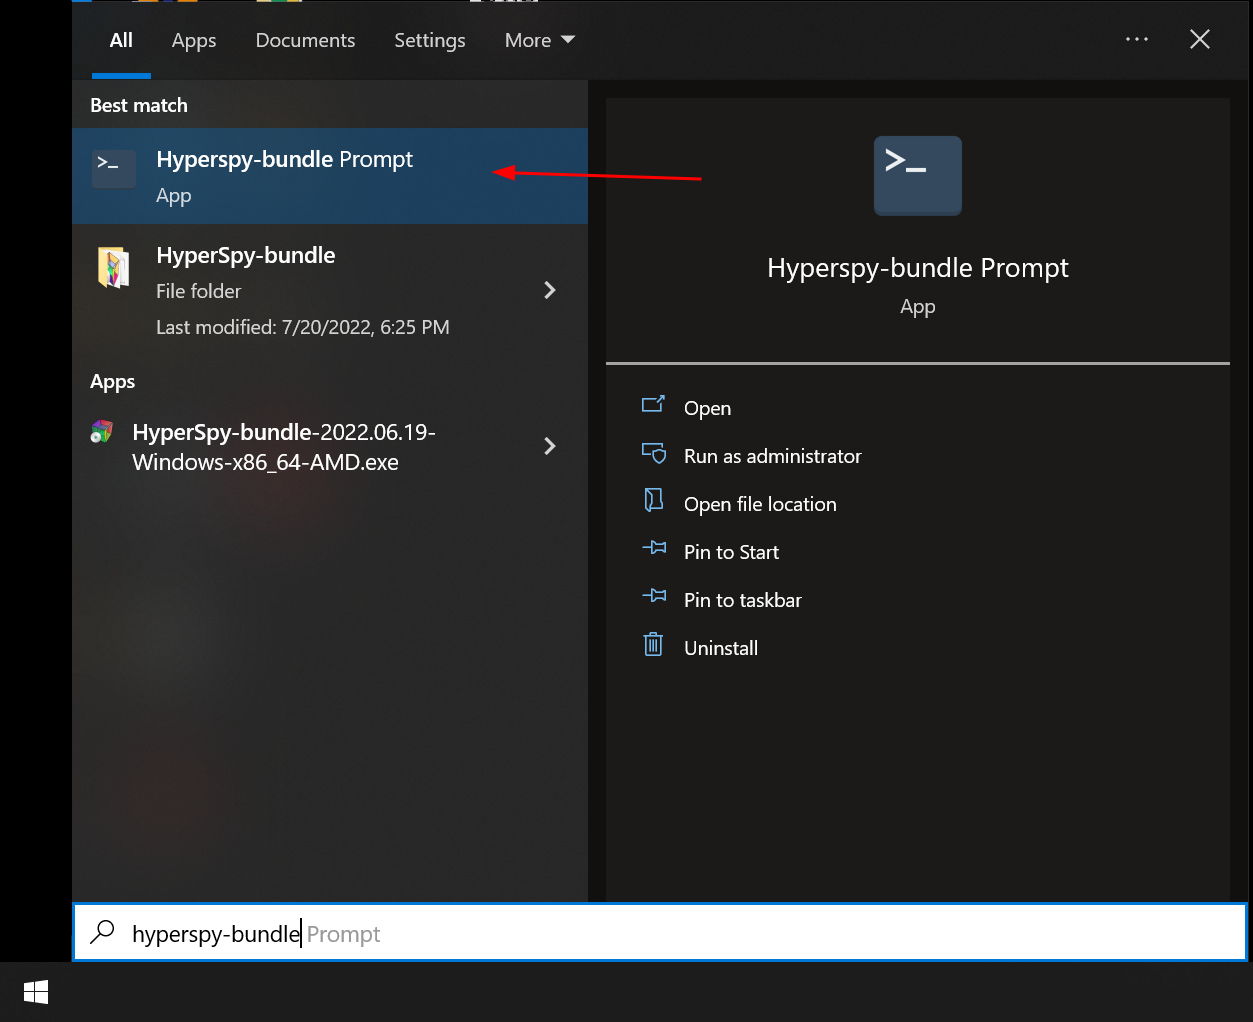
Starting the Hyperspy-bundle Prompt from the Start Menu shortcut installed in the bundle#
Once this prompt opens, enter the text jupyter notebook and press “Enter”.
After a short time, your web-browser should open automatically to the notebook
server that was started. Make sure to leave the Hyperspy-bundle Prompt window open
while you work, as closing it will shutdown the notebook server, and you will
not be able to run any of the code.
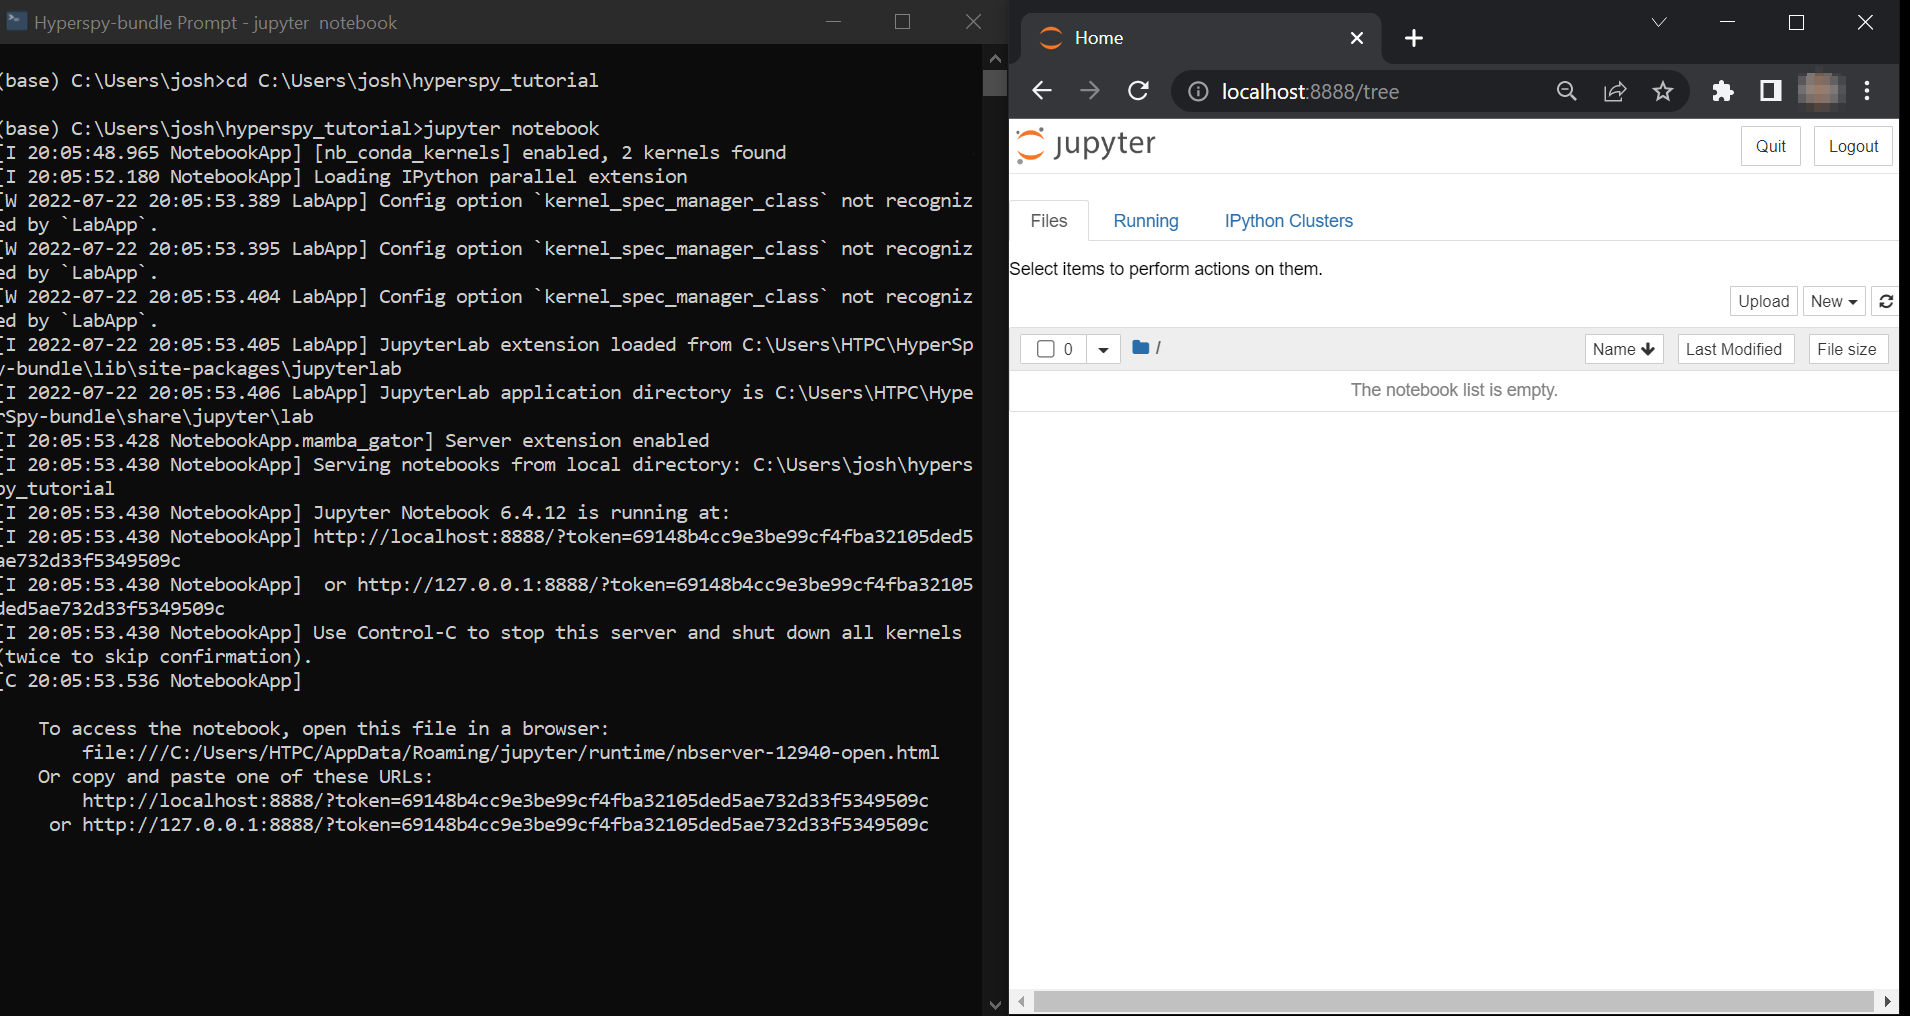
Starting the Jupyter Notebook from the Hyperspy-bundle Prompt#
If you installed with Anaconda, open the Anaconda Prompt (Windows) or a regular terminal
(macOS/Linux). From that prompt, use the cd command to change to the
directory that contains the tutorial notebooks and data that you downloaded
in the previous section. For example, if you saved the data into a folder named
hyperspy_tutorial in your user folder, you would change to that folder with
one of the following commands:
# For Windows:
$ cd %USERPROFILE%\\hyperspy_tutorial

# For macOS or Linux:
$ cd ~/hyperspy_tutorial
Once in that folder, start the Jupyter Notebook server with the following command:
$ jupyter notebook
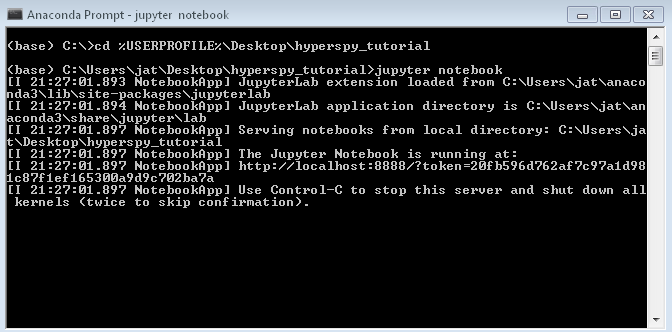
Starting the Jupyter Notebook from the hyperspy_tutorial folder on
Windows#
Regardless if you used the bundle or Anaconda, once you start the notebook “server”,
it will automatically open a browser window (or new tab) to connect to the local server.
Make sure to leave the terminal window open in the background, as closing it will
shut down the notebook server. If everything has worked as expected, then you
will see a representation of the directory structure within hyperspy_tutorial
on the Notebook homepage. If you do not, you can click through the file structure
displayed on the page to get to the correct folder:

Click a folder name to browse into that folder, or a notebook name to open that file#
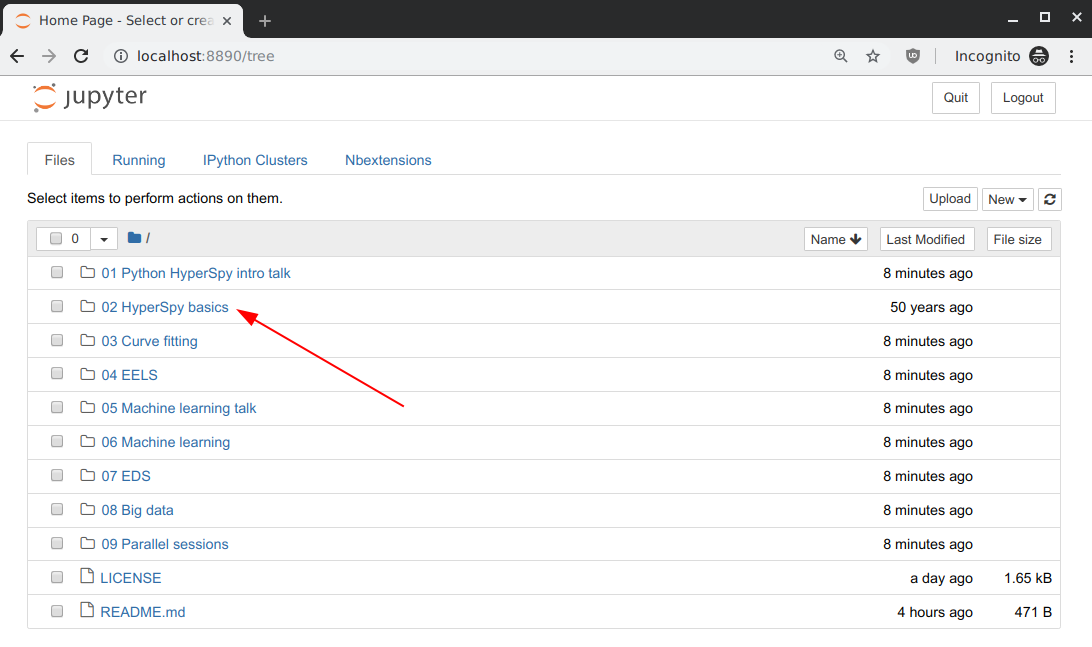
(For example) click the “02 HyperSpy basics” link to browse into that folder#
Once inside one of the folders, simply click on any file with the extension
.ipynb to open the notebook. The notebook will open in a new tab, and can
be interacted with as you need:
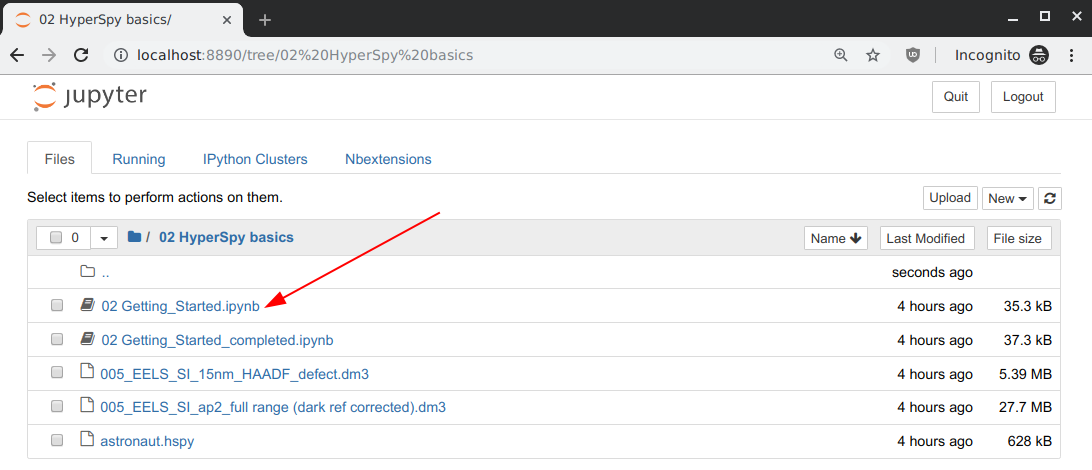
Opening the “Getting Started” notebook within the “02 HyperSpy basics” folder#
The original Jupyter “homepage” will stay open in the first tab, and you can open as many notebooks as you wish at once (as long as you leave the terminal window open in the background).
Congratulations! You should now be ready for the tutorial. If you ran into any trouble, please try to arrive on Sunday morning a bit early, and one of the instructors will be happy to help get you up and running.
Getting Help#
In addition to the links in the header of this page, there are a few additional resources that can be used to get help with questions you may have about using the software. The support page for the project highlights the best avenues for help, but briefly they are:
The HyperSpy User Guide
The HyperSpy user mailing list
The interactive Gitter chat room
The issue/bug tracker on the HyperSpy Github page
The HyperSpy Demos repository, which contains the foundations of the notebooks presented in this tutorial, together with some additional demos
Also, we will be having an open “office hours” session for one hour prior to the start of Sunday’s course. If you have any problems getting things installed, we will use this time for interactive debugging of issues so you can be ready for the course. Please do attempt to install and test your installation before arriving however, as we will not have time to walk every person through every step.
Disclaimer#
Any mention of commercial products is for information only; it does not imply recommendation or endorsement by NIST or the U.S. Government.
NIST-developed software is provided by NIST as a public service. You may use, copy and distribute copies of the software in any medium, provided that you keep intact this entire notice. You may improve, modify and create derivative works of the software or any portion of the software, and you may copy and distribute such modifications or works. Modified works should carry a notice stating that you changed the software and should note the date and nature of any such change. Please explicitly acknowledge the National Institute of Standards and Technology as the source of the software.
NIST-developed software is expressly provided “AS IS.” NIST MAKES NO WARRANTY OF ANY KIND, EXPRESS, IMPLIED, IN FACT OR ARISING BY OPERATION OF LAW, INCLUDING, WITHOUT LIMITATION, THE IMPLIED WARRANTY OF MERCHANTABILITY, FITNESS FOR A PARTICULAR PURPOSE, NON-INFRINGEMENT AND DATA ACCURACY. NIST NEITHER REPRESENTS NOR WARRANTS THAT THE OPERATION OF THE SOFTWARE WILL BE UNINTERRUPTED OR ERROR-FREE, OR THAT ANY DEFECTS WILL BE CORRECTED. NIST DOES NOT WARRANT OR MAKE ANY REPRESENTATIONS REGARDING THE USE OF THE SOFTWARE OR THE RESULTS THEREOF, INCLUDING BUT NOT LIMITED TO THE CORRECTNESS, ACCURACY, RELIABILITY, OR USEFULNESS OF THE SOFTWARE.
You are solely responsible for determining the appropriateness of using and distributing the software and you assume all risks associated with its use, including but not limited to the risks and costs of program errors, compliance with applicable laws, damage to or loss of data, programs or equipment, and the unavailability or interruption of operation. This software is not intended to be used in any situation where a failure could cause risk of injury or damage to property. The software developed by NIST employees is not subject to copyright protection within the United States.